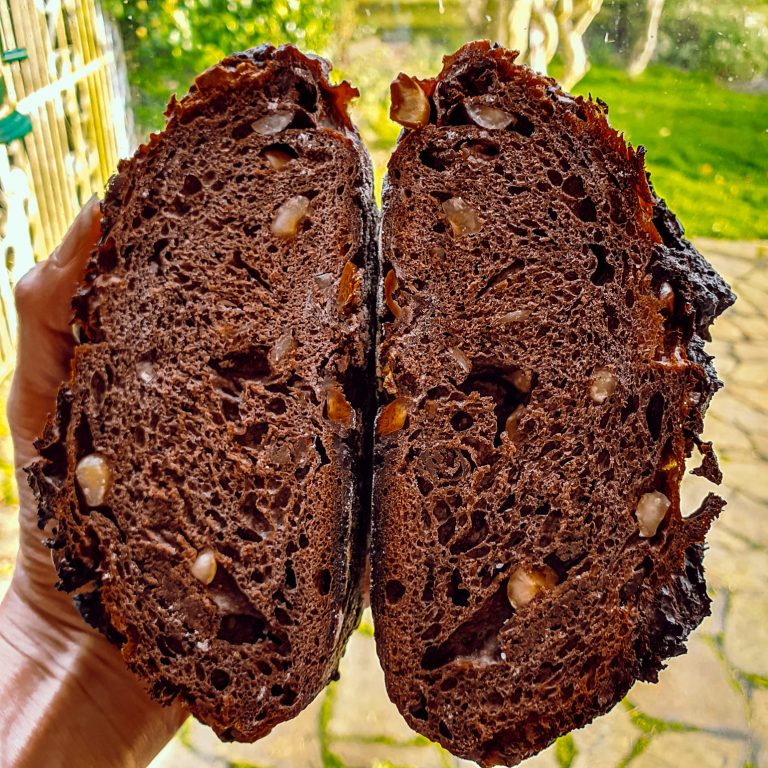
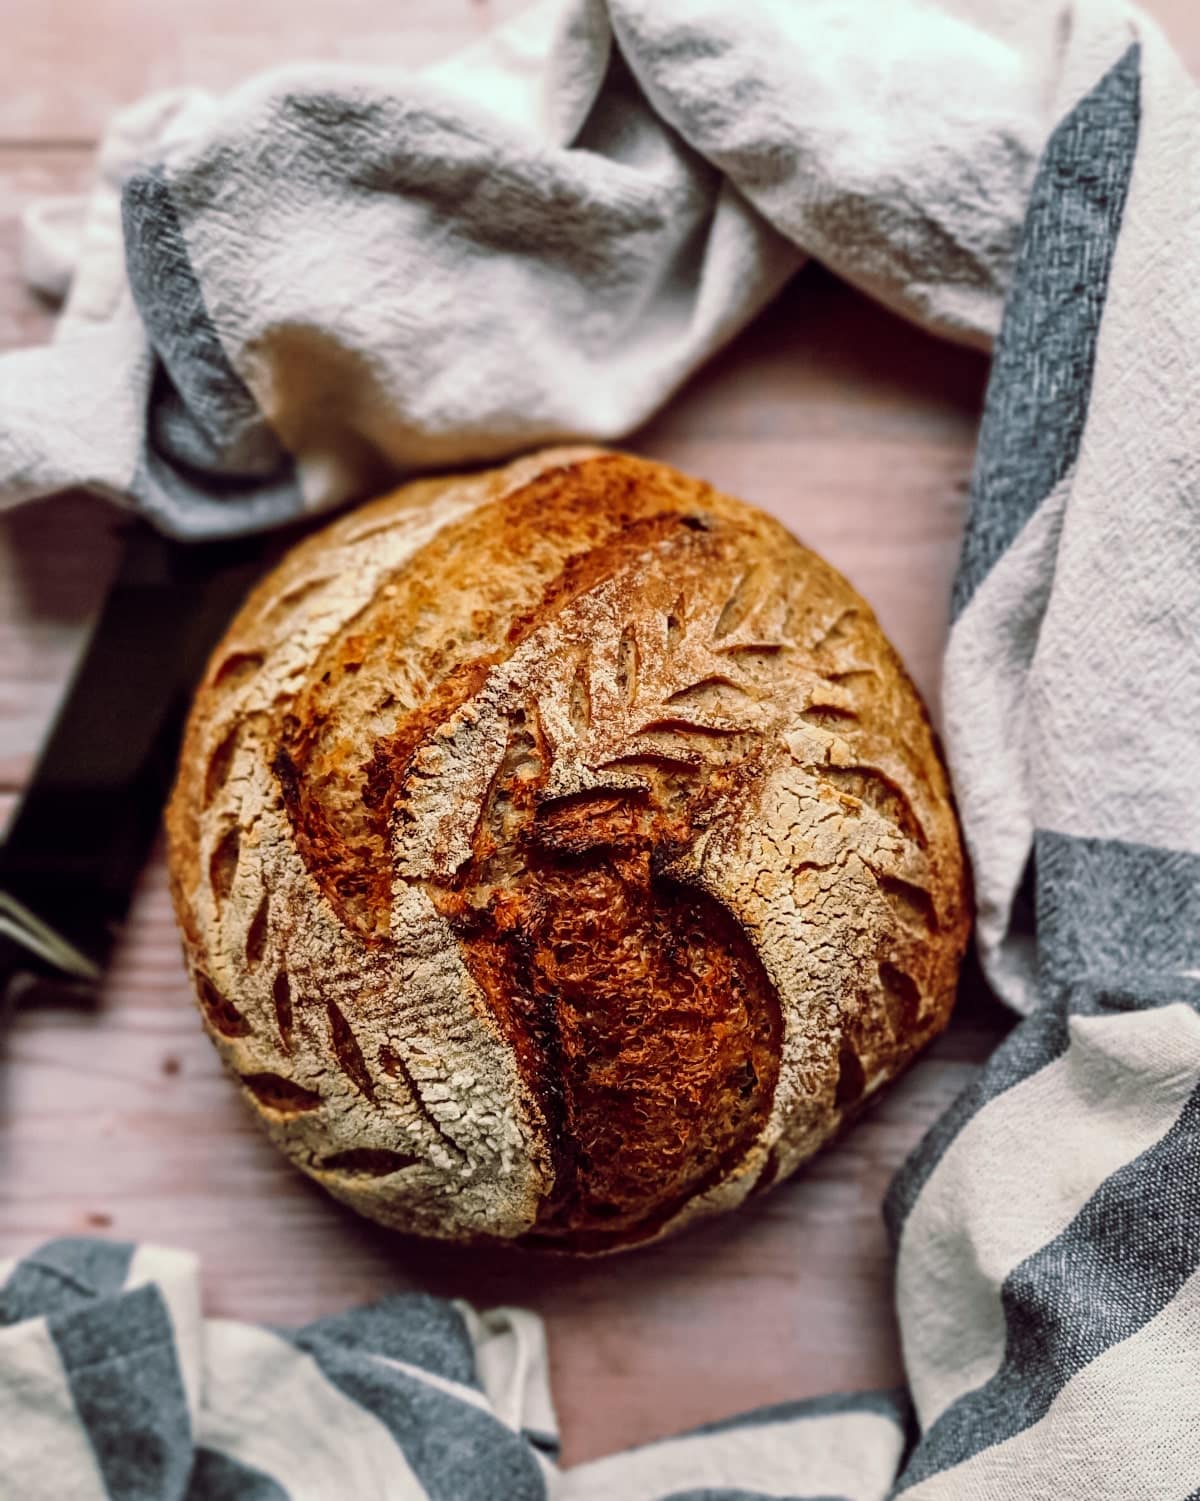
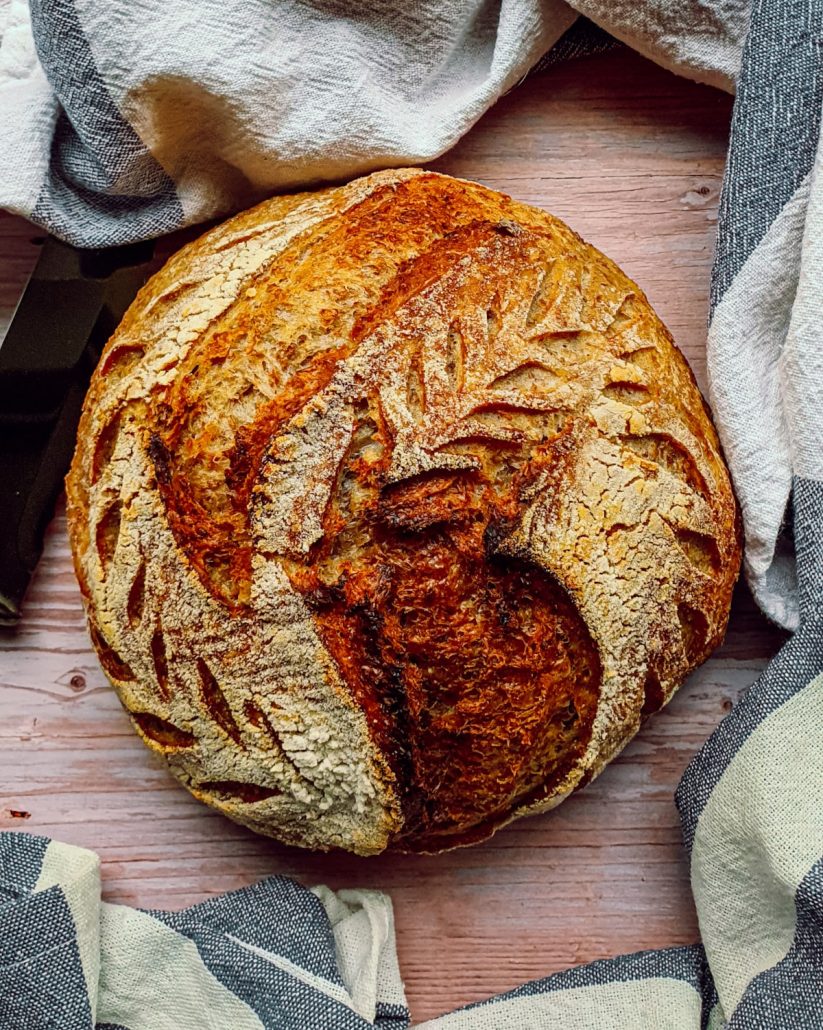
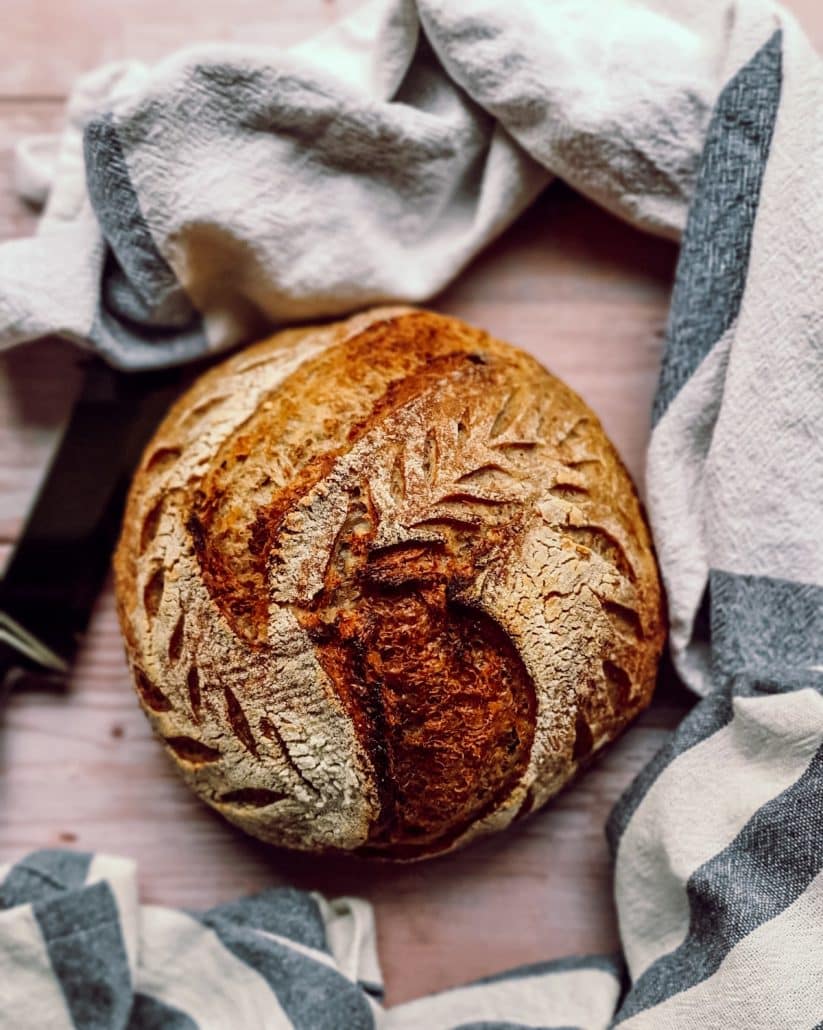
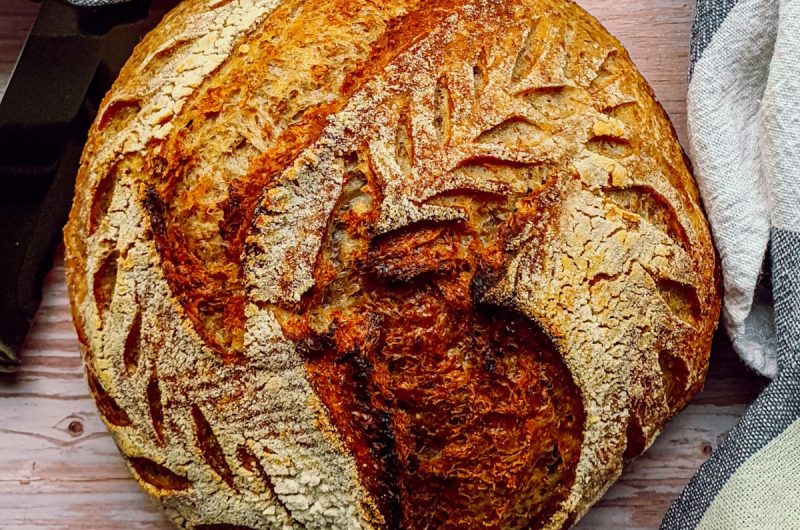
WHOLEWHEAT SOURDOUGH BREAD EASY NO KNEAD
This post may contain affiliate links from iherb.com and other companies, which means that if you click on one of the product links, I’ll receive a small commission. I only recommend products that I use and love. Thank you for your support.
Lately, with the worldwide pandemic, we are living with, we are spending more time at home. That is how I came across the Wholewheat Sourdough Bread thing. Also, it is a fantastic way to include good cultures in your gut.
Sourdough Bread is not a new thing, it is been in the world for more than five thousand years. Bread making depended on the use of sourdough as a leavening agent for most of mankind’s history; until less than 150 years ago when the use of baker’s yeast as a leavening agent started.
Therefore, you will need a sourdough starter, if you have one you are all set. But if you still haven’t created your own SDS* check my Whole Rye Sourdough Starter recipe to start baking some goodies soon. It won’t take more than 6 to 7 days to have a bubbly, alive and active starter.
Then what is so good about Sourdough?
Well for starters its unique flavor develops through long fermentation. Some people say that it’s easier to digest and less likely to spike your blood sugar. Additionally, sourdough bread contains a higher content of folate and antioxidants than bread made from baker’s yeast. As well, its lower phytate levels allow your body to absorb all the nutrients it contains easier.
There are some studies that show Sourdough Bread is easier to digest, this could partly be due to the prebiotic and probiotic-like content. Prebiotics are non-digestible fibers that feed the good bacteria in your gut, while probiotics are good bacteria found in certain foods and supplements. Consuming regularly both prebiotics and probiotics may help improve your gut health, easing digestion.
Moreover, some researchers believe Sourdough fermentation may also degrade gluten more than baker’s yeast. But gluten tolerance varies from person to person. Few have no visible problems digesting gluten, while it can cause bloating, stomachache, diarrhea or constipation in others.
Sourdough bread may lower gluten content this could make it easier to tolerate for individuals sensitive to gluten. However, bear in mind that sourdough fermentation does not degrade gluten completely. So if you have any gluten intolerance or celiac disease you should avoid Sourdough bread containing wheat, barley or rye.
Lucky for us nowadays you can find all the benefits of sourdough fermentation process in gluten-free based bread. Great choice for celiac and gluten-sensitive people. I’ll be posting my Gluten-free Sourdough bread recipe here.
At all times remember that sourdough bread can be made from any type of flour, so opting for a whole grain variety is always best.
Hope you enjoy my recipe and give it a go, snap a picture tag me on Instagram @ikarlina_l #ikarolina_l so I can see it. Also, I am on Pinterest iKarolinaL and Facebook ikarolinal . It will make my day.
Share this recipe for Wholewheat Sourdough Bread on social media
This is my recipe for Wholewheat Sourdough Bread. If you like the recipe then consider sharing it with other Sourdough lovers on social media.
NO KNEAD WHOLEWHEAT SOURDOUGH BREAD
Course: Breakfast, Dinner, Lunch, Recipes, SnackDifficulty: Medium6
servings30
minutes45
minutes201
kcal5
minutes16
hours22.05
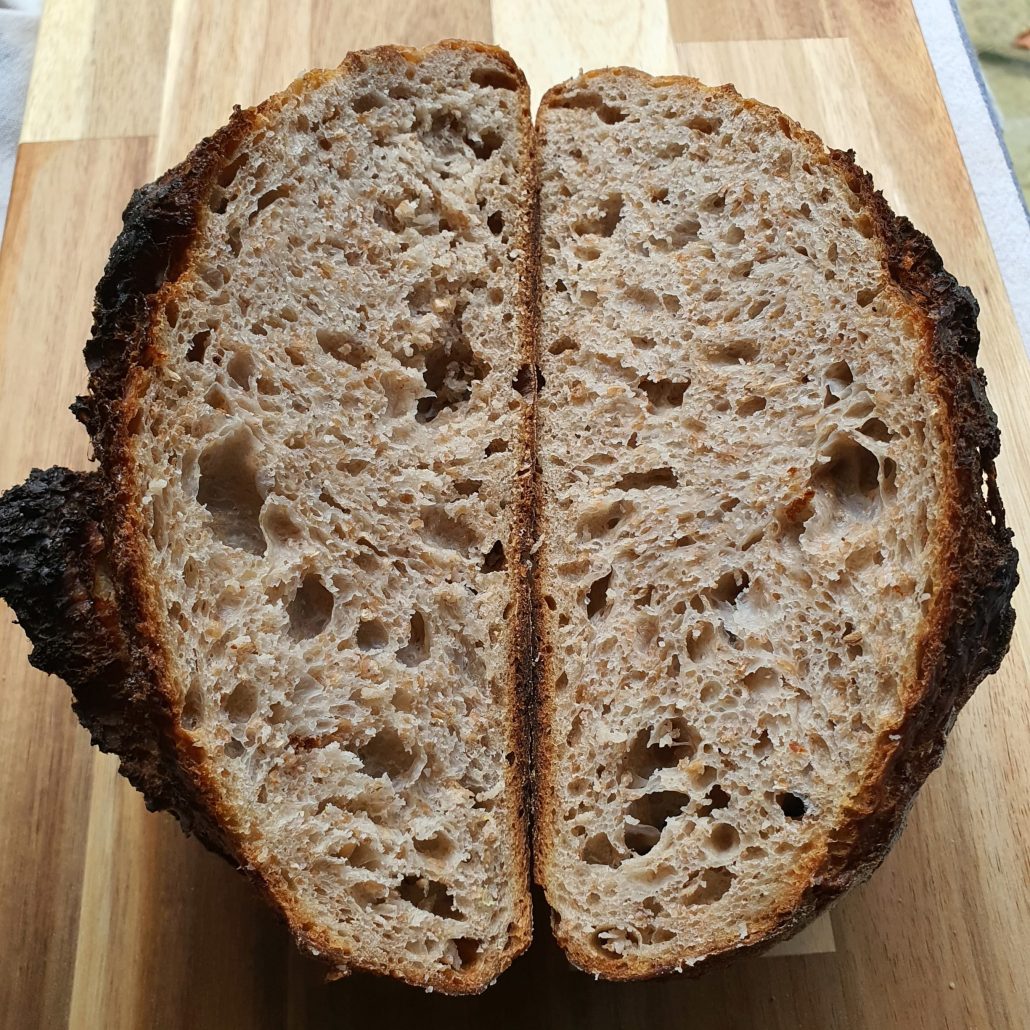
hoursHYDRATION 75% INNOCULATION 25% TOTAL WEIGHT 654G
Ingredients
160g Bread flour (strong white flour)
160g Strong whole wheat flour
230g Water room temperature 25 to 27C
85g Sourdough starter (100% hydration)
6g Pink Himalayan salt, finely ground
Directions
- FEEDING THE STARTER
- About 8-10 hours before intending to bake feed your rye starter at a 1:1:1 ratio. This means taking 60g starter, 60g rye flour, and 60g water and mix everything make sure there are no flour pockets in it and let it grow at room temperature.
- If you forgot the night before do it early morning or as soon as you remember and pop it into a warm place about 28 to 30C for 6hrs.
- Whether the method step 1 or 2 place a rubber band to mark the growth of the starter.
- MIXING THE INGREDIENTS
- Once the starter has reach double in side has reached its pick so it is time to mix all the flours and salt in a bowl.
- Mix it with your fingers or whisk until fully combined.
- Add sourdough starter and water.
- Mix with your fingers, a Dutch whisk or if you prefer your stand mixer with the paddle attachment until no dry bits remain.
- Now leave the dough to rest covered for 60 minutes. (autolyse)
- STRETCH & FOLD, BULK FERMENTATION
- Now perform three sets of stretch and folds spaced out by 30 minutes at your room temperature is above 30C but if it under 30C even 21C wait 45minutes to do next stretch and fold.
- After the last set do a windowpane test, if the dough fails, let the dough rest 30 minutes or 45minutes more and do another set of stretch and folds and then go to the bulk fermentation step.
- Put the dough in a see-through container where you can monitor the bulk. Let the dough rise 25 to 35%. You can mark the container with a marker to know when has reached the wanted percentage.
- The time varies on a lot of factors, so go by the rise, but check with the time. For reference, at around 24°C/75°F it might take 2-3 hours to rise the dough to 25%. I suggest checking now and then to don’t overproof the dough.
- PRE-SHAPING
- Pre-shape the dough into a boule (ball). Do this by taking a corner and bringing it to the center about 4 to 6 times. And flip the dough upside down.
- Let the dough rest on the counter for 20 minutes covered with a bowl.
- FINAL SHAPING
- Now final shape the bread into boules (ball) or batards (rectangle) depending on your preference. Boules are absolutely the easiest, so if you’re new go for that. Watch a video for technique if you wish. But it is pretty much the same as the pre-shaping. Sprinkle a tiny amount of flour on top of the dough and with help of a bench scraper flip the dough and do the same of the pre-shaping. Once it is upside down using our two hands you are going to roll the dough clockwise this will create tension on the top of the dough for better oven spring. But if you want to make a sandwich look loaf, sprinkle a tiny amount of flour on top of the dough and with help of a bench scraper flip the dough with care pull the dough from the edges and form a rectangle, then take one of the longest sides and bring it to the middle and do the same with the other side. Now take the shortest sides one at a time and bring them in like a ¼ not halfway, repeat the other side.
- Now the dough is shaped dust a banneton or a bowl line up with a clean kitchen towel with rice and flip upside down the dough so the top stays at the bottom. If you go for the loaf pan line it up with parchment paper and place the dough with the rough plated size down and the smoothest side up.
- Then put the banneton or loaf pan in a plastic bag. I particularly use a big zip-lock bag like the Ikea ones are great. If using a conventional bag close it loosely by tugging the end underneath the banneton or bowl.
- Place the banneton, bowl or loaf pan into your fridge. Your fridge should be ice cold. Mine’s set to 4°C.
- Let the bread retard for at least 8 hours, up to 48 hours. I usually bake them when hit the 18hours mark. The flavor is tangy but not overdo.
- BAKING THE BREAD
- Heat your oven to 260°C/500°F. I have two methods here. First with a baking steel (optional) and Dutch oven inside. Heat for an entire hour to make sure both are completely saturated with heat. Second method, if you don’t have a Dutch oven make sure to preheat your oven for an hour, 15 min before the hour mark place in the bottom of the oven a tray with boiling water to create steam that will make your bread spring.
- Method 1. Grab the dough from the fridge. Remove the bag.
- Dust the bottom of the boule with rice flour and put parchment paper over and your peel on top. Flip it over so the dough rests on parchment paper on the peel.
- Dust the top of the boule with more rice flour and smooth it carefully with your hands.
- Score the dough with a sharp knife or a razor.
- Open the oven and take out the Dutch oven carefully it is burning hot. Place it on a heatproof mat, remove the lid. Grab the four corners of the parchment paper and place the dough with the parchment paper inside. Take a few ice cubes and put them inside the Dutch oven under the paper, this will create more stem inside for better spring. Put back the lid on and place back the Dutch oven in the oven.
- Close the oven and bake for 20 minutes.
- Then open the oven and take the top off the Dutch oven.
- Turn down the heat to 230°C/450°F.
- Bake for another 20 minutes until the bread is golden and crispy.
- Take the bread out and put it on a wire rack to cool.
- Method 2. the dough from the fridge. Remove the bag.
- Dust the top of the dough in the loaf pan with rice flour carefully.
- Score the dough with a sharp knife or a razor.
- Take an additional tray and fill it up with ice and place it at the bottom of the oven beside the other tray with water.
- Now place the loaf pan in the middle rack of the oven.
- Close the oven and bake for 30 min at 260 C.
- Turn down the oven to a 230 C and bake for further 25 min until golden crispy.
- Take the bread out and put it on a wire rack to cool at least for an hour.
Notes
- *SDS = Sourdough starter
Nutrition Facts
6 servings per container
- Amount Per ServingCalories201
- % Daily Value *
- Total Fat
1g
2%
- Saturated Fat 0g 0%
- Trans Fat 0g
- Cholesterol 0mg 0%
- Sodium 83mg 4%
- Potassium 0mg 0%
- Total Carbohydrate
43g
15%
- Dietary Fiber 2g 8%
- Sugars 1g
- Protein 8g 16%
- Calcium 1%
* The % Daily Value tells you how much a nutrient in a serving of food contributes to a daily diet. 2,000 calories a day is used for general nutrition advice.