HOW TO GROW ALFALFA SPROUTS AT HOME
This post may contain affiliate links from iherb.com and other companies, which means that if you click on one of the product links, I’ll receive a small commission. I only recommend products that I use and love. Thank you for your support.
Back home I used to go grocery shopping and buy Alfalfa Sprouts as they were always available at the supermarket. On the contrary, here in Ireland I barely can find them in any shop, they are not popular at all. As a consequence, I decided to Grow Alfalfa Sprouts at Home.
What are sprouts / sprouting?
Sprouts are very young plants that are just a few days after they germinate. In a nutshell, sprouting is the natural process of seeds when hydrated starts growing (germinate) and developing roots and tiny leaves. This action will take from 1 to 10 days depending on the seeds you choose to sprout.
Why alfalfa sprouts are so beneficial to include in your diet?
Let’s talk about a bit of history first. Sprouts have been a staple of Chinese cuisine for more than 5 million years, and they are starting to become popular in the west kitchen as well.
Sprouts have a large number of important nutrients than the actual vegetable in its full-grown size. Such as folate, magnesium, phosphorus, calcium, beta-carotene and vitamin K. The latter been critical to healthy bone growth, proper blood clotting, and many other body functions. More benefits and nutrition values here.
What seeds can you sprout at home?
I have read that you can sprout pretty much every seed that you want. For example, the most common are Alfalfa, Broccoli, Mung Beans, clover, kale, radish, mustard and onion for salads. As well you can sprout grains like Buckwheat, whole-grain wheat, barley, rye, millet, rice, and oats, for bread making.
Most importantly, make sure the seeds are organic to ensure a good source of nutrients, vitamins and minerals.
But Why include Alfalfa sprouts into your diet?
Alfalfa might help lower cholesterol, control sugar levels in the blood and help to relieve symptoms of menopause.
It has a high content of antioxidants and vitamin C among others. In addition, alfalfa is low in calories as well as adding lots of fibre into our diet. Moreover, there are people claiming that reduces the risk of breast cancer but no conclusive studies have found this yet.
On the other hand, there are some people who should avoid Alfalfa sprouts. For instance, pregnant women, people taking blood-thinning treatments or people with autoimmune disorders. Always consult with your GP/MD to see if you are safe in consuming this great micronutrient.
How and what do you need to grow Alfalfa sprouts at home?
I am going to show you how to sprouts Alfalfa seeds at home in the easiest way. For this, you will need organic Alfalfa seeds, water (spring or filtered), a glass jar like Mason Jars or Kinley Jars, cheesecloth or a sprouting lid, a kitchen towel and few minutes of your time in the morning and night.
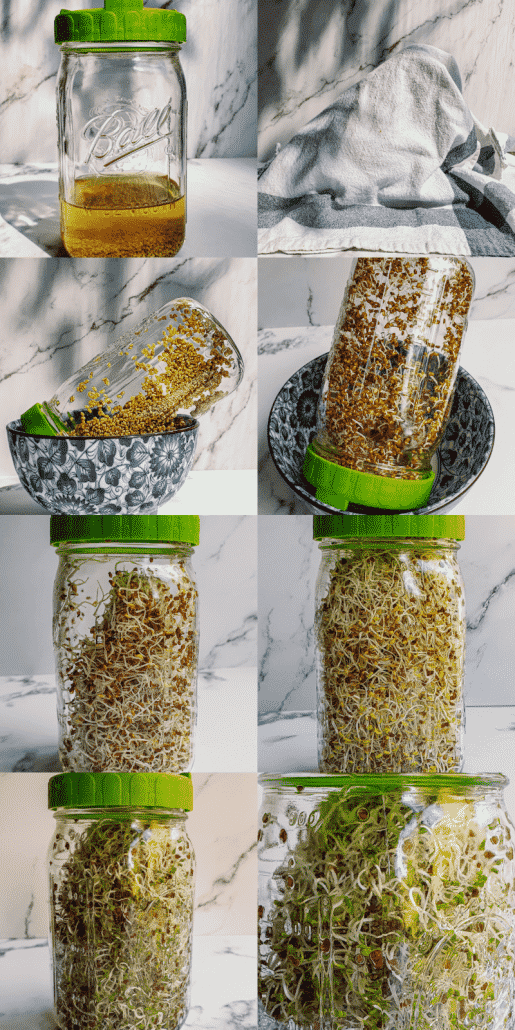
- Clean and sterilize the jar of your choice, add 2 Tsp of Organic Alfalfa seeds, 2-3 times water enough to cover them and let sit for 8 to 12 hours away from sunlight. When the time is up, drain the water, add more cool water rinse well and drain again removing as much water as possible,
- Place the jar upside down in a tilted (/) position in a bowl cover with the clean kitchen towel at room temperature away from direct sunlight. For the next 3 days you will be rinsing and draining the seeds every 8 or 12 hours.
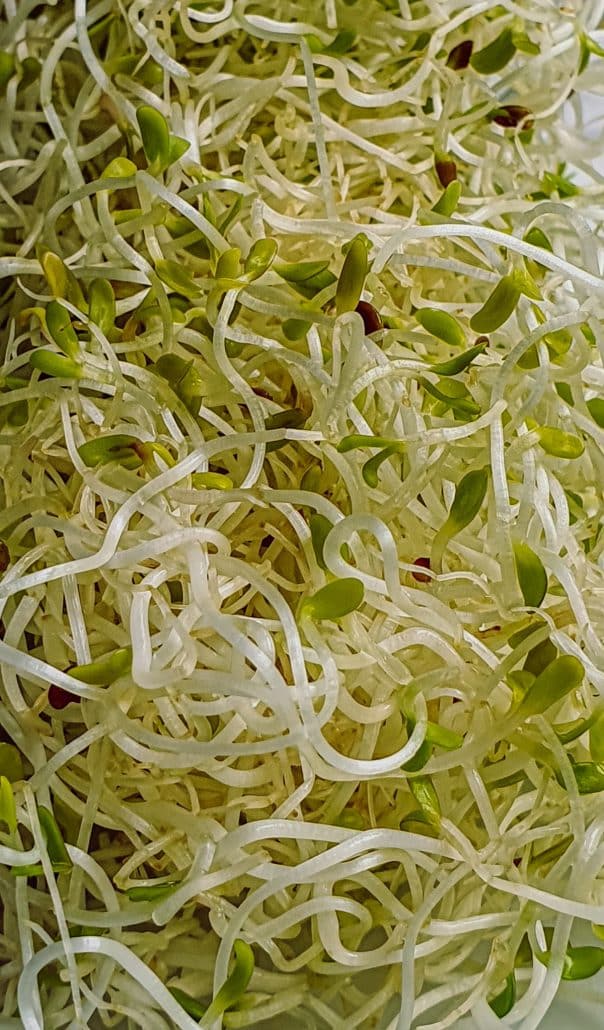
- On day 4 place the jar in an area with indirect sunlight to allow photosynthesis. You will see the tiny leaves turning from a yellowish colour to a pretty green colour. After that, you will be still rinsing and draining every 8 -12 hours for the next 5th and 6th day.
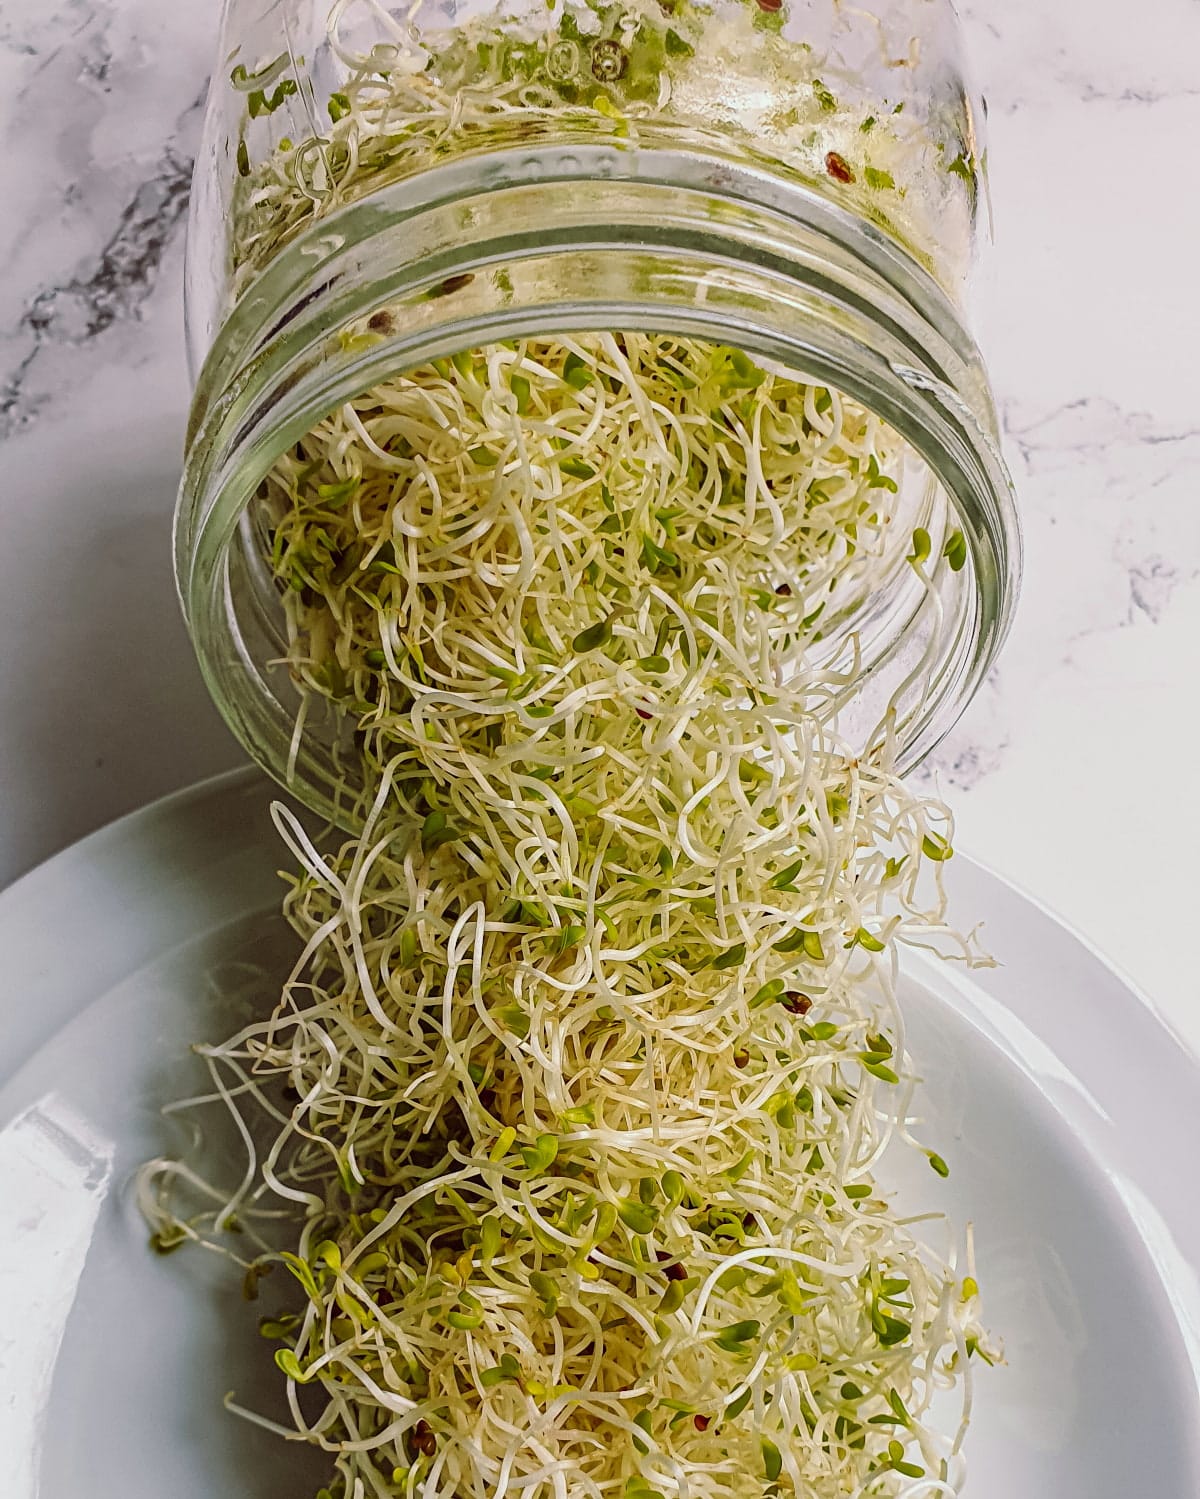
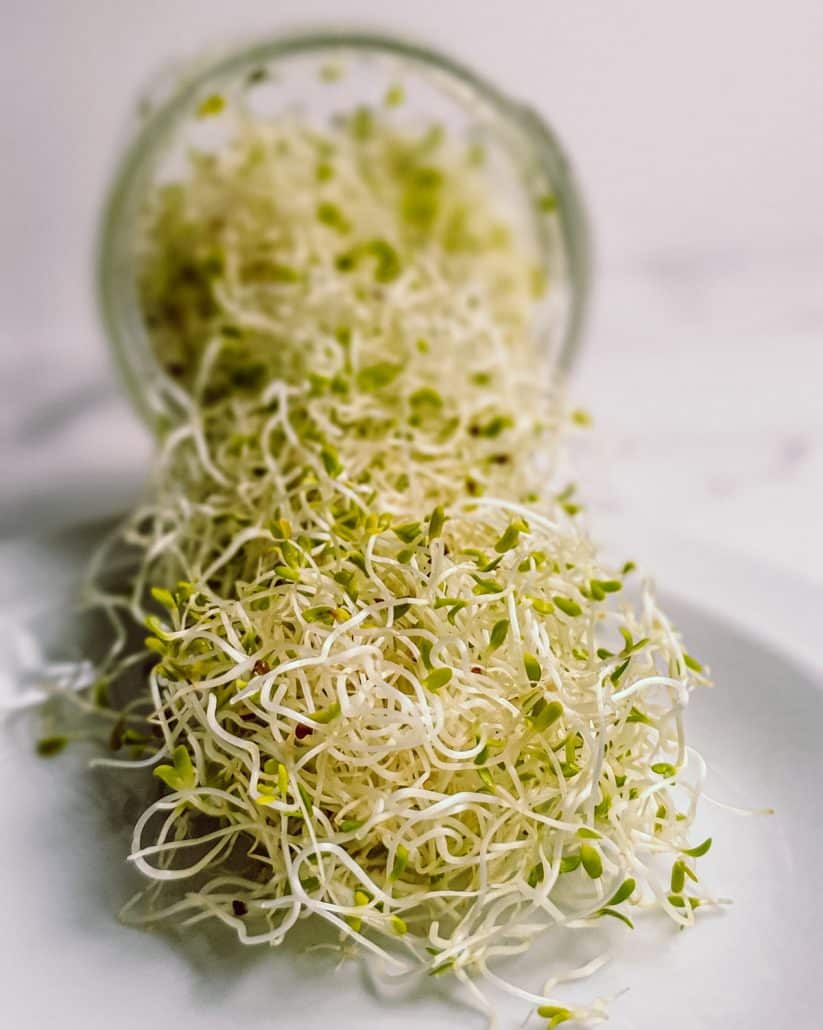
- On day 6 your Alfalfa Sprouts are ready to eat.
Storing the Alfalfa sprouts
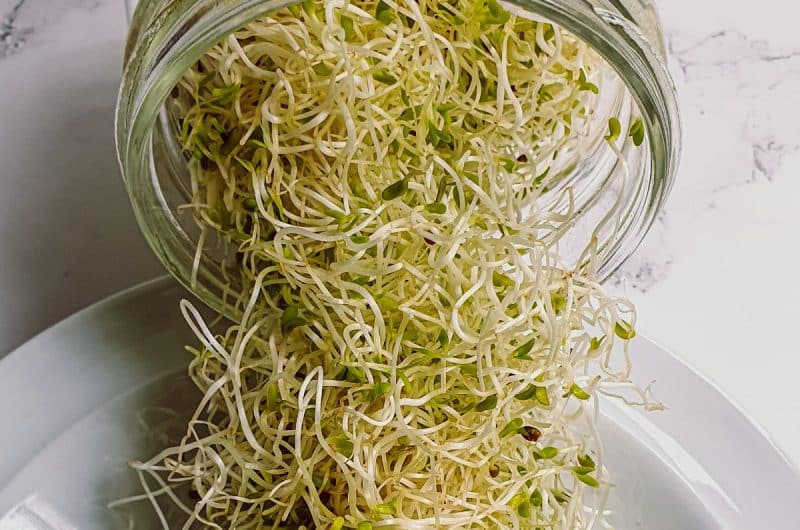
You probably already have noticed all the husk from the seeds, to remove them. For example, what I personally do is, first place them in a large bowl with plenty of cool water, secondly, you will see that the husk will sink or float drain the water, and, keep rinsing until most of the husks have been removed. Place them in a sieve cover with some kitchen paper to drain the excess of water a few hours are fine. After that, transfer to a clean dry glass jar or airtight container and keep in the fridge. They last a good week.
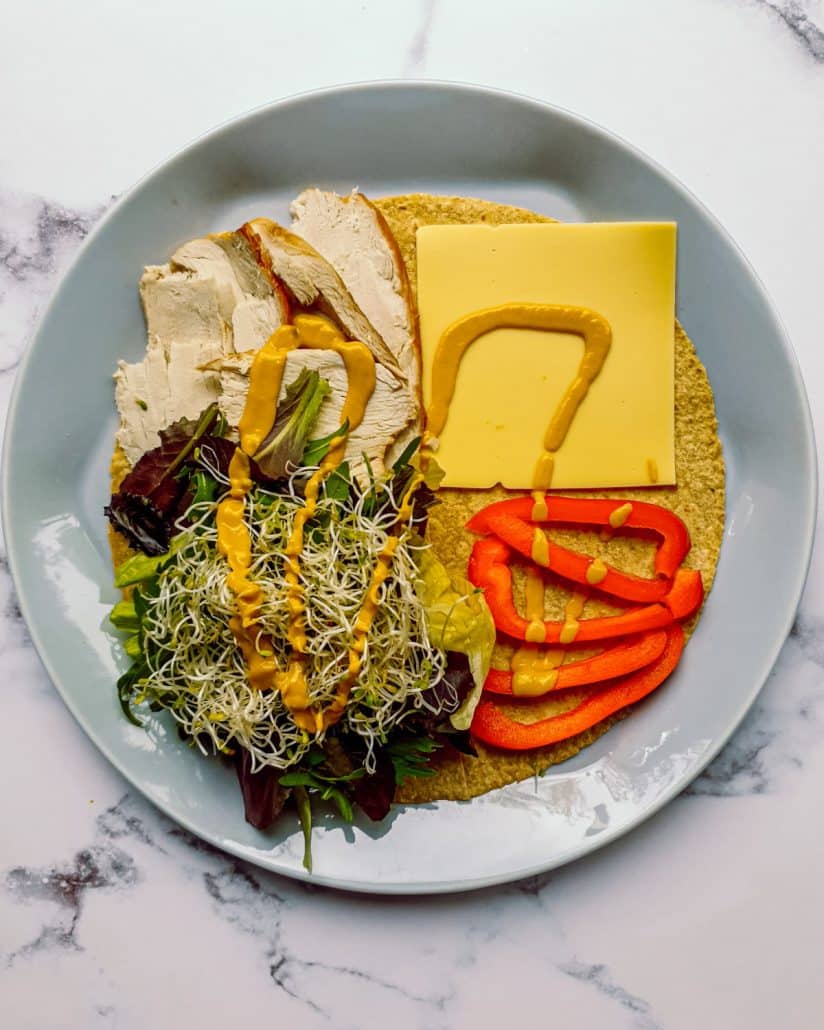
You can add them to salads, sandwiches, wraps, burgers as a garnish for soups, tacos and omelettes.
WANT MORE HEALTHY RECIPES?
Low Fat Chimichurri Sauce
Gluten Free Focaccia Bread
Protein Magnum Ice Cream Bars
Lean Beef Burger
Gluten Free Taco Seasoning
Air Fryer Zucchini Fritters
Moroccan Lamb Turkey Kofta
Thai Green Curry Paste
Super Soft Gluten Free Hot Cross Buns
Protein Carrot Cake Donuts
Protein Pumpkin Donuts
Gluten Free Easter Chocolate Cookies
Pumpkin Oat Protein Cookies
Pumpkin Protein Bread Copycat Starbucks
Double Chocolate Protein Banana Bread
Chocolate Protein Pancakes
Hope you enjoy this post and grow your own Alfalfa Sprouts at home, snap a picture tag me on Instagram @ikarlina_l #ikarolina_l so I can see it. Also, I am on Pinterest iKarolinaL and Facebook ikarolinal . It will make my day.
Share this post for How to Grow Alfalfa Sprouts at Home on social media
This is my recipe for How to Grow Alfalfa Sprouts at Home. If you like the recipe then consider sharing it with other sprout lovers on social media.
HOW TO GROW ALFALFA SPROUTS AT HOME
Course: SaladsDifficulty: Easy10
grams5
minutes3
kcal8
Hours6
DaysIngredients
1 tbsp (11g) Organic Alfalfa Sprouting Seeds (Zesty Sprouting Mix, Broccoli Sprouting Seeds)
2 L Spring Water filtered, this could be more or less
- Equipment
sprouting jar or wide-mouth quart-sized mason jar
sprouting lid for wide-mouth
Directions
- Clean and sterilize the jar of your choice, add 2 Tsp of Organic Alfalfa seeds, 2-3 times water enough to cover them and let sit for 8 to 12 hours away from sunlight. When the time is up, drain the water, add more cool water rinse well and drain again removing as much water as possible,
- Place the jar upside down in a tilted (/) position in a bowl covered with the clean kitchen towel at room temperature away from direct sunlight. For the next 3 days, you will be rinsing and draining the seeds every 8 or 12 hours.
- On day 4 place the jar in an area with indirect sunlight to allow photosynthesis. You will see the tiny leaves turning from a yellowish colour to a pretty green colour. You will be still rinsing and draining every 8 -12 hours for the next 5th and 6th days.
- On day 6 your Alfalfa Sprouts are ready to eat.
- Now drain the water, place the sprouts in a large bowl and fill in with plenty of cool freshwater, you will see that the husk will sink or float drain the water and keep rinsing until most of the husks have been removed.
- Place them in a sieve and cover them with some kitchen paper to drain the excess water a few hours are fine.
- Then, transfer to a clean dry glass jar or airtight container and keep it in the fridge. They last a good week.
- Enjoy in salads, sandwiches, wrap, soup, stir fry, and more.
Nutrition Facts
10 servings per container
- Amount Per ServingCalories3
- % Daily Value *
- Total Fat
-1g
-1%
- Sodium -1mg -0%
- Total Carbohydrate
0.4g
1%
- Dietary Fiber 0.3g 2%
- Protein 0.4g 1%
* The % Daily Value tells you how much a nutrient in a serving of food contributes to a daily diet. 2,000 calories a day is used for general nutrition advice.